It depends on the project. There are different types of panels (if the house is panel), respectively, and the height of the floor of the house can vary from 2 to 3 meters. As a rule, if we talk about a panel house, the floor height is 2.5 meters. In brick, it can be slightly higher, but within 3 meters. Higher floors were in old houses 3-3.5 meters (Stalinist houses, 50-60 years). Now they are trying not to do more than 2.8-3 meters in height.
The floor height is equal to the distance from the floor level of a particular floor to the floor level of the floor above. 2.8 or 3.0 m floor height of a typical residential building. In one house, the height of the floors may be different, for example, if there is a shop or a public institution on the ground floor.
Taking some modern multi-story houses in Moscow, the height of the first floor is 4.2 m, the height of ordinary floors is 3.2 m, the thickness of the floors is 220 mm.
Everything will depend on the project of this or that structure. If you take Stalin, then there are ceilings of at least three meters, and in Khrushchev at least 230 cm. And the more or less standard height is still 2.5 m. Yes, and to be precise, you need to add the thickness of the ceiling, because the question asks for the height of the entire floor. So it turns out that at least you have to add another 10 cm.
you decide to build wooden house- wonderful! After choosing a project, it's time to choose a construction company wooden house. At this stage, you will have to delve into and deal with many nuances. Otherwise, you run the risk of ending up with a completely different house than you wanted, or spending much a large amount than planned.
With a lot of competition, many construction companies go to various tricks to attract customers with a low construction price. But guided only by the price, without understanding what you get for it, you often have to remember the proverb that "the miser pays twice."
In this article, we have analyzed several main points that you need to pay attention to when choosing a contractor.
House area (price per 1 m²)
When choosing a project, many focus on total area at home and calculate the cost of 1 square meter building a house. But the area of \u200b\u200bthe house can be “calculated” in different ways.
We calculate the net area of all rooms minus the walls. It is this area that will be at the disposal of the Customer after the final finishing.
Many Contractors calculate the area by axial dimensions (some manage to calculate in general by the external dimensions of the house).

* With a conditional project cost of 2,000,000 rubles
Floor height
Another lot important point in the house - this is the height of the floors or, in a simple way, the height of the ceilings. Everyone knows that with high ceilings it is spacious and comfortable, and with a height of, for example, 2.2 m, you feel like in a bathhouse.
For a wooden house, it is necessary to distinguish between 2 floor heights. The first is the floor height before the house shrinks. It is equal to the distance between the floor beams immediately after assembling the house "under the roof". The second height after shrinkage (clean) is equal to the distance from the floor to the ceiling after shrinkage and finishing the house.
It is on the difference between these two heights that dishonest contractors cheat.
1st floor + attic
Given the box height of 3m and the thickness of the floor beams of 200mm, we get the height of the 1st floor before shrinkage - 2.7m. And taking into account the finish (subtract 50mm on the floor and ceiling) and shrinkage, we get about 2.55-2.6m
The height of the 2nd floor is limited by the crossbar (a necessary element of the roof). Depending on the height of the gables, this height can be 2.5m, 3m, and in some projects even higher.
By the way, some construction companies manage to go to the trick here too, indicating the attic area equal to the area of the 1st floor. In fact, the usable attic area is smaller and limited to rafters.

If you are promised a height of the ground floor of 2.7m clean with a box height of 3m, then this is fantastic. Or the contractor saves on load-bearing beams (not 200, but 150 mm), reducing the strength of the ceiling.
1.5 floors + semi-attic
For this version of the house, you should pay attention to the height of the box, the height of the pediment and the thickness of the ceiling (height of the beams).
The height of the 2nd floor in this embodiment may no longer be limited by the crossbar, as in the previous one, and may be up to the ridge itself. With the dimensions indicated in the diagram, the height of the 2nd floor can be up to 3.6 m at the top point.
It is important to pay attention to the height of the side walls. With a box size of 4.5m, this height will be 1.4m before shrinkage and 1.3-1.35 when clean.
It should be noted that construction companies reduce the cost of construction due to the height of the box. With a box height of 4 m, the height of the side walls on the 2nd floor will be less than a meter, and this creates discomfort during the operation of the house.

For this type of house, it is necessary to clarify the height of the box and gables in order to independently calculate the height of the floors and the side wall of the 2nd floor.
2 full floors
For two-story house everything is much easier. With a box height of 6m, we obtain a floor height of 2.7m before shrinkage, and 2.55-2.6m in cleanliness.

For a 2-storey house, it is important to know only the height of the box, and the rest of the calculations will not be difficult.
Summing up, there are 4 important parameters that affect the height of the floors:
- Height of the box (log),
- pediment height,
- Floor thickness (beams),
- Wall shrinkage! (read more below).
Knowing the values of these parameters, you can easily calculate the height of the floors, and at the stage of signing the contract you can check your expectations and the decency of the contractor.
Earlier in the article, we mentioned wall shrinkage. Let's talk about it in a little more detail.
Shrinkage of walls depends on many factors. The main ones are the material of the walls and interventional insulation (what is used). Many companies keep their home shrinkage statistics using a variety of methodologies. The indications are quite different.
Based on our statistics, we give the following figures for the shrinkage of houses:
until 3%
For rounded logs and sawn timber of natural moisture content
up to 2%
For profiled timber of natural humidity
When laying on jute insulation 10-12mm
up to 5%
For hand-cut log cabins with natural humidity
When laying on moss
After assembling the house under the roof, the actual height of the box may be more than the design one (for example: according to the project 3m, in fact 3.1-3.15m). The shrinkage value must be calculated from the actual height after assembly.
Equipment
Initially, the client finds on the site or in advertising the cost of building a house that is favorable for him. This is achieved by reducing the cross-sections of the supporting structures, the thickness of the insulation layer, and simplifying the joints of the joints "to the point of being impossible."
Despite the fact that all people are different, they are similar in their desire to end up with a reliable and safe home. This is what managers use. They offer to improve the equipment (sections of beams, rafters, floor height, etc.). Accordingly, the cost immediately increases, increasing by 1.5-2 times from the initial one. In order not to fall for this bait, we will analyze the main parameters of the 1st stage of the construction of a wooden house.
Foundation
1. Tape shallow foundation

The diagram shows the options for foundation sections offered by various contractors. By reducing the cross section of the foundation, they reduce the cost. It is also possible that, with the same cross section, a lower price is achieved due to the materials used in the production and the amount of work. Below we have given the main materials and work required for the installation of the foundation and our recommendations.
Concrete
It is advisable to take a brand of concrete not lower than M300 (B 22.5). We use only factory certified concrete with the attached passport.
fittings
Corrugated reinforcement is used at least 10mm in diameter (we use 12-14mm).
Waterproofing
We recommend waterproofing the sole and side surfaces of the tape at the stage of formwork installation. You can use special films, roofing material, waterproofing. We use roofing material RKP-350. When pouring concrete, waterproofing retains moisture in the mix, thereby improving the quality of the concrete as it cures.
formwork
For formwork, a board or plywood is used. The most important thing is that the finished formwork retains its shape and integrity during pouring. This is achieved by using studs, ties, braces and other methods in the formwork construction.
Quarry sand
Used as a cushion under the foundation to reduce heaving under the base of the foundation.
Works
The standard scope of work for the installation of the foundation should be as follows:
- Geodesy,
- trench digging,
- Installation of formwork with waterproofing and ventilation ducts,
- Reinforcing cage knitting,
- Acceptance of concrete. If access to the formwork is difficult, then a concrete pump is usually used to supply concrete to the formwork,
- formwork dismantling,
- Removal of the fertile layer of soil inside the foundation.
- Delivery of all materials to the site with unloading.
2. Pile-tape (pile-grillage) foundation
The parameters for the tape (grillage) and the scope of work are identical to the parameters of the previous type of foundation. We recommend the following parameters for the pile part:
- The diameter of the piles should be 200-300 mm, depending on the width of the tape of this foundation.
- The distance between the piles should not exceed 2-3m, depending on the material of the walls and the size of the future house.
- The depth of laying piles is 1.6-2m below ground level.
3. Screw pile foundation
Gaining popularity today screw foundation. Its advantages are relatively low price and installation time (up to 1 day).
- The pile diameter must be at least 108mm. For log houses and two-story heavy houses, we recommend using piles with a diameter of at least 133mm.
- The diameter of the blades is not less than 300mm.
- The thickness of the pile walls is not less than 4 mm, and the blades are not less than 5 mm.
- After installation, the cavity of the pile must be filled. We recommend a mortar of sand concrete grade M300.

Outside, the pile is treated with paints and varnishes. At a minimum, these are two layers (primer and enamel) or a two-component anti-corrosion enamel. It is possible to use polymer coatings of piles, but this leads to a serious increase in the cost of the structure.
A very important point is the technology of screwing piles. During installation, a pit is first dug into which the pile is installed. This pit should be no more than 30-40 cm deep. We recommend using special equipment for driving piles where possible. When twisting by hand, the rotation of the pile shaft must be uniform without jerks.
The number of piles is calculated based on the project, but in any case, the distance between the piles should not exceed 2.5 m, and for light houses and baths no more than 3 m.
If, when signing the contract, the attached documents lack the description of any type of work from the above, then be sure that if you demand to fulfill it, you will have to pay extra.
Walls
Another mechanism for misleading the Customer. Usually, the sites present projects with a drawing of the final version on a turnkey basis. This is a standard solution for a person to see and understand what kind of house will turn out in the end. On many projects, part of the internal walls are designed in a frame version to reduce the cost and, due to the inexpediency of making them permanent. These frame partitions are mounted after the house shrinks at the finishing stage.


Before concluding a contract, it is very important to clarify and know which walls are capital and are included in the price at the initial stage.
The trouble is that some contractors are so keen on reducing the cost of the project that they leave only the outer walls as capital. This can be fraught, especially for homes with large sizes. With such a layout, deformation of the walls during shrinkage of the house is possible. The walls will subsequently stagger and there is even a danger of the structure collapsing.
We must not forget about the other materials used in the assembly of walls. The main ones are dowels and interventional insulation. Nagel, in other words, dowels, are used to fasten the crowns of the box to each other vertically. They can be round or square.
Some companies use ordinary construction nails or fittings for quick assembly. It is not right. In the future, the appearance of gaps between the crowns is possible, because. nails will prevent uniform shrinkage of the walls.
Mezhventsovy heater is quite different. Moss, tow, jute, artificial materials are used depending on the material of the walls. It is important that the contractor use the appropriate insulation of the required thickness so that it does not subsequently blow out of all the cracks.
We use 100% jute insulation 10-12mm, so that after shrinkage, due to the thickness of the layer, all interfaces between the crowns of the walls of the house are filled.
Before signing the contract, you should know which log or timber walls will be installed at the first stage “for shrinkage” and what consumables the contractor will use.
Roof
The most important thing in the roof is the supporting structures (truss system) and right choice mounts. If you save on this, then the roof can be deformed or simply fail under the action of a snow load. For houses, we recommend using edged lumber with a section of 50x200mm.
In the truss structure, the pitch of the rafters is very important. It should be 600-700mm (except for the installation of skylights).
You also need to understand the "roofing pie" itself. For clarity, we have shown in the figure roof options for a temporary roof and turnkey.


It is necessary to immediately clarify what material, what section and what the supporting structure of the roof will be, so that you do not have to completely redo it, overpaying a lot of money.
Works
Everyone has construction companies the price of the house "under the roof" includes a different list of works. We presented minimum list works and services necessary for the production of the first stage of construction.
- Delivery of a house kit by trucks.
- Unloading materials by crane or manually.
- Installation of scaffolding.
- Assembling the walls on the dowel.
- Insertion of floor beams.
- Installation of a roof under roofing felt or other coating.
- Organization of accommodation for workers.
- Power supply of the facility.
If any of these items is missing or not specified, then you will probably be asked to pay extra in the process.
Bottom line: At the stage of choosing a project and a contractor, do not rush to sign a contract because of the very favorable price. Calmly, with a "cold mind" familiarize yourself with the package. If the contractor withholds any of the above information from you or does not give a clear answer, then there is reason to think. Perhaps he reduced the cost of the project at the expense of your safety. As a result, you will have to correct those miscalculations that you can notice in time with your own efforts and additional expenses. Don't forget: "Free cheese is only in a mousetrap."
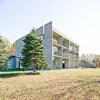
An apartment building differs from an individual one in that it has several separate exits to a land or apartment plot. Also, houses are recognized as multi-apartment houses, the height of which exceeds 3 floors, including underground, basement, attic, etc.
Classification of the number of storeys of buildings
There is the following classification of residential buildings, which differ in the number of floors:
- Low-rise (1 - 3). Most often, they include individual residential buildings. The height of the building, as a rule, does not exceed 12 meters;
- Mid-rise (3-5). The floor height of 15 meters is a standard five-story building;
- elevated number of storeys(6-10). The building is 30 meters high;
- Multi-storey (10 - 25):
- High-rise. From (25 - 30).
The number of storeys of a building is considered solely by the number of floors above ground. When calculating the number of storeys, not only the value from floor to ceiling is taken into account, but also the value of inter-storey ceilings.
Apartment buildings. Number of floors and height of buildings
AT modern projects The "golden mean" is the height of one floor of 2.8-3.3 m.
Only highly qualified specialists are engaged in the construction of multi-storey buildings, since this business requires not only high costs, but also has many nuances.
There are the following types of multi-storey buildings:
- Panel. Belongs to a series of budget. It has a high construction speed, but poor heat and sound insulation. The maximum number of storeys is about 25, depending on the design. In a residential area, the height from floor to ceiling is 2.5 - 2.8 m, depending on the size of the panels.
- Brick. The construction speed is quite low, because the construction is costly. Thermal and sound insulation indicators are much higher than panel ones. The optimal possible number of floors is 10. The average height of each is 2.8 - 3 m.
- Monolithic. These buildings are quite diverse, because everything depends on bearing capacity concrete. They have high seismic resistance. To improve heat and sound insulation during construction can be used brickwork. Allows you to build about 160 floors. Height from floor to ceiling 3 - 3.3 m.
How to get a permit for an IHS? What does a builder need to know?
Permitting authorities follow the order of development and agree on documents for individual housing construction according to RSN 70-88. Thanks to them, not only the accuracy of building up the site is determined, but also the layout of the dwelling and auxiliary buildings. This project needs to be well thought out, because what is not displayed in the plan will be recognized as an unauthorized structure and must be demolished or re-approved.
Without permission, that is, before the approval of the plan and receipt of documents, work should not begin, otherwise serious problems may arise. In order to find out exactly what documents are required to start building, you should read the "Code of rules for the design and construction of SP 11-III-99".
In 2010, SNiPs were recognized as binding rules. They regulate activities in the field of urban planning, as well as engineering work, design and construction.
In order to obtain permission, you need to contact the BTI or the architectural department of the city to provide:
- application for a building permit;
- documents establishing the right to use the site;
- certificate of field determination of boundaries, placement of buildings, etc.;
- cadastral plan site;
- House project.
Once issued, the permit is valid for 10 years.
Individual housing construction
 The number of storeys of an individual residential building is calculated based on the number of residents and personal preferences. The minimum height of a room according to SNiP is 2.5 m. If the height does not meet these parameters and turns out to be lower, then this room will be considered unsuitable for habitation.
How many floors can be built on the site? On an individual plot it is permissible to build three storey building about 9 meters high. In this case, both underground and above-ground premises are taken into account.
What can be erected in the garden?
Many are interested in the question of what can be built and how many floors can be built independently on garden plot? In addition to outbuildings, it is possible to build a dwelling on the garden plot that is not suitable for registration. When erecting buildings on a garden plot, SNiP should be followed.
Sending a "family ship" to sail the ocean called individual construction you should study well the "pilot" - objective factors that affect the cost and comfort of the future cottage.
Dangerous shoals and underwater rocks await beginners along the way. One of the main stumbling blocks is the question of which house is better to build: one-story or two-story.
In favor of each option, not only objective, but also far-fetched arguments are cited. Getting acquainted with them, it is difficult for the developer to orientate correctly. Not understanding who to trust, he begins to act at his own peril and risk.
As a result, the budget allocated for the creation of a family nest suffers, and living conditions turn out to be worse than expected.
The purpose of this article is to analyze the main factors that need to be taken into account: the cost of construction and the convenience of living. Individual tastes and preferences, which are “innumerable”, we have taken out of the discussion. To begin with, let's recall the first myth, which says that a two-story cottage is more profitable and more convenient than a one-story one. Upon closer examination, you will see that this is not entirely true.
For a correct comparison of the cost of one and two-story buildings, it is necessary to bring them to a "common denominator": the same area, common structural elements and construction technologies. Without this, the analysis loses its meaning, since the price of each stage will be different in different options.
In popular videos on this topic, the authors make one serious mistake. In their tables they compare not average cost construction of a cottage, and the volume of basic work. As a result, it is concluded that it is more profitable to build a one-story or two-story house. We offer a more accurate estimation methodology based on the total estimated costs.
So, let's compare the costs of building two cottages of the same area (160 m2): one-story 10x16m and two-story 10x8m. We take the foundations of tape monolithic reinforced concrete of the same height (from the sole to the upper mark of the basement 1.6 meters, width 0.5 m).
Walls (height 3 m, thickness 0.43 m) - aerated concrete blocks+ facing brick.
The ceilings of the first and second floors are wooden beams. The roof is a hipped gable metal tile (angle of inclination 30 degrees).

For our calculations, average current prices for 2017 are taken. In each case, the numbers will be different. However, the calculations we made will clearly show you an objective calculation algorithm and allow you to compare one and two-story houses with other parameters.
Foundation

- Foundation perimeter one-story building(10 + 16 m) x 2 = 52 pm;
- For a cottage with a height of 2 floors of the same area, the length of the foundation tape will be less: (10 + 8 m) x 2 = 36 pm.
The volume of concrete for pouring in the first case is 52 x 0.5 x 1.6 = 41.60 m3. In the second option, we need 36 x 0.5 x 1.6 = 28.80 m3. Concrete savings for a 2-storey building will be: 41.60 - 28.80 = 12.80 m3. On filling the blind area (width 1 meter thickness 0.1 m) we will save (52-36) x 1.0 x 0.1 = 1.6 m3.
The difference in concrete and reinforcement work, taking into account the price of materials, will be equal to (12.80 + 1.6 \u003d 14.40 m3) x 5,000 rubles. = 72,000 rubles. in favor of a two-story building. If we add to this amount the insulation of the foundation with foam plastic (8,000 rubles), then the result will increase up to 80 000 rub.
Walls

For some, this will be news, but the area of \u200b\u200bthe walls of a one-story building is less than that of a two-story building:
- 52 pm x 3m height = 156 m2;
- 36 pm x 6 m height = 216 m2.
The difference is 60 m2. Savings on masonry (front brick + aerated concrete), taking into account work and materials, will be equal to 60 m2 x 3400 rubles / m2 = 204,000 rubles.
To this amount must be added the rise in price due to high-rise works on the 2nd floor (scaffolding + difficulty factor). It is at least 15% (204,000 x 1.15 = 234,600 rubles)
As we can see, at the stage of masonry, the savings on the foundation are completely “eaten up” by the walls. Therefore, on a two-story building, we go into the minus for 154,600 rubles (234,600 - 80,000 rubles).
Ceilings and roof

In the single-level and two-level versions of the buildings, the floor areas are the same (160 m2 each). Therefore, in a dispute about what is cheaper to build, this point does not cause controversy.
But the roof of the “one-story building” under consideration is 91 m2 larger (taking into account the slope of the slopes of 30 degrees). The rise in the cost of installation, taking into account materials, will be: 91 m2 x 2,300 rubles / m2 = 209 300 rub.
Stairs

You can't do without it in a two-level house. The price of the stairs varies in a wide range (on average from 50 to 200 thousand rubles). The cost of it is minus the "two-story building". In a comparative calculation, we will take the average value of the cost - 120 thousand rubles.
Second bathroom, heating and electrical wiring
The need to equip a toilet and shower in a two-story building is beyond doubt. Climbing up and down from the bedroom to the first floor, especially at night, is a dubious pleasure. plumbing expenses, Decoration Materials and work in the budget version is at least 50,000 rubles. In a one-story cottage, a second bathroom is not needed.
The perimeter of the walls at the one-story building we are considering is 52 linear meters. For a two-story building, this figure is 36 x 2 \u003d 72 pm. Along the length of the heating pipes, we will get a difference (20 m x 2 \u003d 40 m) plus 8 meters for the heated water supply pipes and the “return” from the boiler to the upper level. The price of installation and materials for this additional section of communications: 48 pm x 400 rubles / pm = 19,200 rubles.
The increase in the cost of electrical networks in a 2-storey cottage due to the greater length of the outer walls will be at least 15,000 rubles.
In total, in terms of “bathroom, heating and electrics”, the construction of a one-story building is more profitable than a two-story building. The savings will be (50,000 + 19,200 + 15,000 = 84 200 rub.)
Price Total
Comparing the cost of structures, equipment and work on the construction of two-story and one-story cottages in our example, we can draw the following conclusions:
- The foundation and blind area at the two-story building turned out to be cheaper by 80,000 rubles;
- Her outer walls are more expensive by 154,600 rubles;
- The savings on the roof is 236,600 rubles;
- The staircase increases the cost of construction by 120 thousand rubles;
- The second bathroom, together with heating and electrical networks, increases costs by 79,200 rubles.
As a result, we get: 80 000 – 154 600 + 209 300 – 120 000 – 84 200 = 69 500 rubles rise in price for the construction of a two-story house.
Completing money theme, we note that a two-level cottage saves the area of \u200b\u200bthe site. In those regions of Russia where land is expensive, the construction of a high-rise building allows you to "win" a very tangible amount.
Pros and cons of living
The second part of the questions does not concern your wallet, but their value is no less than the size financial investments. Having saved on a construction site, you may face serious inconveniences of living. Therefore, let us consider in more detail what advantages and disadvantages the compared buildings have.
The layout of rooms that are not divided by height into two levels is more convenient for residents. With a well-planned one-story building, there is no need for corridors that take up a large part of the area.

In a two-level house, the main planning problem is the stairs. If you make it comfortable (wide and not steep), then it will take at least 15 m2. The desire to save on size makes it uncomfortable and traumatic for the elderly and children. Partial loss usable area can be compensated by placing a dressing room or pantry under the stairs.
The second floor is a welcome corner of silence and relaxation for the family. Therefore, bedrooms are usually placed here. The noise from the utility and living rooms on the first floor practically does not reach here.

If the building will be built in a picturesque area, then the visibility factor must be taken into account. Two-storey cottage unrivaled in this regard. Having made an open terrace or loggia at the top, you can enjoy the surrounding landscapes every day. On the ground floor, you can admire only a beautiful plot and a fence.
From an architectural point of view, a high facade is more expressive and more promising than a low one. It has enough space for external decor (columns, pilasters, cornices, belts). In addition, supporters and opponents of tall buildings agree on one thing: appearance such buildings are more solid and richer than those of low ones.
If we talk about the cost of maintenance, then a one-story house has more advantages. Any work related to the restoration or replacement of finishes, gutter systems can be done here from a conventional staircase. For repair work on a tall building, scaffolding is needed, self-assembly or rental of which will cost a pretty penny.
When deciding which house to build, do not forget to correlate its area with the size of the plot:
- on 5-6 acres, a residential building with an area of 120 m2 (one- or two-story) is optimally located for a family of 4 people;
- plots of 10-12 acres are best suited for cottages up to 200 m2;
- a house with an area of 350 - 400 m2 requires at least 15 acres of free territory.
From the point of view of energy efficiency, a two-story building could be recognized the best option. The heat from the premises of the first level here does not go to the cold attic, but warms the second floor. However, in a two-story house, the area of \u200b\u200bthe outer walls is larger and, accordingly, heat loss through them is greater than in a one-story house.
findings
After weighing the arguments for and against, we can conclude that in financial plan building a one-story cottage is more profitable. Practice shows that this advantage is preserved in most cases, however, such a conclusion is certainly not an axiom. From the point of view of living comfort, the cost of repairs and maintenance, the “one-story building” also outperforms the two-level structure.
In the asset of a two-story house, you can write down the savings in the area of the site. In addition, its advantages include a more expressive appearance of the facade and good visibility.
Video "FOR" one-story building:
Video "FOR" two-story building: